I suppose it's the season, with so many people baking cookies and all, but it seems like there's been an alarming rise in the number of alarmist articles about the dangers of eating uncooked cookie dough (at least if it's made with eggs). Now, of course, this is sound medical and/or nutritional advice that I've been steadfastly ignoring for the better part of forty years.
When I was a kid growing up, my parents would engineer some really epic baking sessions. They draped one of our counters in an old sheet that they used for purpose, to put the warm cookies to cool. Mom would fire up her Kitchen Aid mixer and triple every recipe, because what's the point of having a Kitchen Aid mixer if you're not going to strain the capacity of its bowl and the power of its engine? And what's the point of baking cookies if you're not going to bake enough for several months of cookie eating (which, given that we had a "strict" three-cookie limit per meal, wasn't actually as long as you might think).
Mom and Dad worked together to manage this affair, loading cookie sheets with dough and unloading the finished cookies to the greasy sheet designated to the task, and eventually to Tupperware. Usually they would make several kinds of cookies, the most common being peanut butter, Corn Flake cookies (which also included coconut, to give you some idea of what they were actually like), and of course chocolate chip (strictly from the Betty Crocker Cookbook recipe). I think we occasionally had snickerdoodles and somewhat more often sugar cookies.
I apprenticed at my father's knee, mostly learning the fine art of pre-cleaning the beaters with tongue and fingers. Sometimes the spoons needed a similar cleaning. Sometimes you just needed to make sure the dough was still good, I guess. And then you'd have to try the cookies as soon as they were cool enough not to burn the tongue and at regular intervals thereafter.
And it only got worse when I baked cookies as an adult, because whatever checks there may have been to prevent overconsumption of cookie dough were wholly absent in my bachelor pad. Like my mother before me, I would load up my Kitchen Aid with triple batches of dough (as one does). But, at a guess, maybe half of that batch actually earned the honor of being cooked, because ovens are a rather slow cookie delivery system.
So I guess what it comes down to is that it's a miracle I'm still alive, given the dire warnings I've seen and the sheer quantity of raw eggs in the form of cookie dough that I've eaten in my lifetime. I suppose I've squandered a lifetime supply of luck on this survival, otherwise I'd be fabulously wealthy by now.
So it goes. Cookie dough is delicious, and I regret nothing.
You can print that on my tombstone if salmonella gets me.
Showing posts with label cooking. Show all posts
Showing posts with label cooking. Show all posts
Tuesday, December 11, 2018


Monday, March 17, 2014
Recipe: Paleo Irish Bacon and Cabbage
Perhaps you didn't know this, but the "traditional" corned beef and cabbage of St. Patrick's Day is not actually all that big of an Irish tradition. From what I understand, they pretty much just bring it out for the tourists. Traditionally, beef was expensive, so pork or bacon was the more commonly-used meat.
And that was convenient, since neither Lauren nor I particularly care for corned beef. We'll leave aside, for the moment, the fact that Lauren doesn't particularly care for cabbage, either.
This simple recipe isn't exactly traditional, but it's a good balance between tradition and a Paleo approach to food. I absolutely loved this, and I think Lauren would have, too, if she didn't hate cabbage.
One nice thing about this recipe is that once you get the sweet potatoes going, the other prep work of cutting and cooking all fit nicely into the time allotted.
1 large sweet potato, peeled and diced
2-3 T. cooking oil (I used butter and bacon grease), melted
10 oz (or more) bacon, diced
1 can diced tomatoes
1 c. chicken stock (or other stock)
2 c. thinly sliced cabbage
salt and pepper, to taste
Pre-heat oven to 400. Peel and dice the sweet potatoes and melt your cooking fat. Toss the diced sweet potato in the fat and place on an aluminum-foil-lined baking sheet. Bake for 20 minutes, stirring halfway through.
Meanwhile, dice the bacon and cook it in a large pot, stirring regularly. When cooked, drain off excess fat and add tomatoes and chicken stock. About this time, the sweet potatoes should be done. Add them to the pot. Cook for 5-10 minutes or longer. Add the cabbage and cook for a couple minutes. Add salt and pepper to taste.
And that was convenient, since neither Lauren nor I particularly care for corned beef. We'll leave aside, for the moment, the fact that Lauren doesn't particularly care for cabbage, either.
This simple recipe isn't exactly traditional, but it's a good balance between tradition and a Paleo approach to food. I absolutely loved this, and I think Lauren would have, too, if she didn't hate cabbage.
One nice thing about this recipe is that once you get the sweet potatoes going, the other prep work of cutting and cooking all fit nicely into the time allotted.
1 large sweet potato, peeled and diced
2-3 T. cooking oil (I used butter and bacon grease), melted
10 oz (or more) bacon, diced
1 can diced tomatoes
1 c. chicken stock (or other stock)
2 c. thinly sliced cabbage
salt and pepper, to taste
Pre-heat oven to 400. Peel and dice the sweet potatoes and melt your cooking fat. Toss the diced sweet potato in the fat and place on an aluminum-foil-lined baking sheet. Bake for 20 minutes, stirring halfway through.
Meanwhile, dice the bacon and cook it in a large pot, stirring regularly. When cooked, drain off excess fat and add tomatoes and chicken stock. About this time, the sweet potatoes should be done. Add them to the pot. Cook for 5-10 minutes or longer. Add the cabbage and cook for a couple minutes. Add salt and pepper to taste.
Tuesday, December 17, 2013
How I Learned to Cook
Today on a fellow Holidailies blogger's blog, she talked about cooking at home versus eating out. That got me thinking back to our Thanksgiving break, when we had a Chinese student spending the holidays with us, and noticing that I do all the cooking in our house, he asked how I learned to cook. So this is a post about how I became a cook.
 I grew up in a house where my mom cooked dinner pretty much every night. I wouldn't say that I learned to cook from her, though. I did develop a deep appreciation for the baking of desserts. From an early age, I had a strong understanding of all aspects of cookie baking, from bringing together the sugars and fats to adding the rest of the ingredients to tasting--and constantly re-tasting--the dough to make sure it is good, to spooning the dough out onto the baking sheet (pressing peanut butter cookies down with a fork in a criss-cross pattern) and taking the cookies off. My mother had a firm belief that making a triple recipe of cookies was no more trouble than making a single recipe, and once you got started baking cookies, you might just as well bake a half dozen different varieties. She would freeze the extras, if any could properly be called "extra."
However, other than cookies, I was an incredibly picky eater (the only pickiness I showed with cookies was a distaste for raisin). I drove my mother and my grandmother crazy with my unwillingness to eat a whole lot of things. However, when I went to college, I went ahead and tried a bunch of things because a lot of things were new and I wanted to see what I would like, and also I recognized that being a picky eater made me look kind of weird to other people (the positive power of peer pressure!), so I started eating more things.
 One of the things I discovered in the dining
hall was the freshly baked bread they had there, but when I came back home to my small town in northern Ohio, there wasn't yet any available other than whatever varieties Wonder made: white, wheat, rye... and I think they were just coming out with potato bread. So over the summer I came home
and wanted to learn to cook—but more especially to learn to bake bread. So Mom
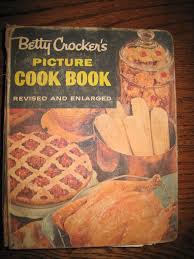
got me a Betty Crocker picture cookbook and I started with that. And I basically learned how to make white bread, whole wheat bread, and dinner rolls, but being fresh-baked, those varieties were still pretty exciting.
Later that summer, I went to a writing workshop, and fired up about my new interest, I talked about it with anyone who would listen. One of the friends I made over kitchen talk was an adult male with an interest in cooking, who recommended the Moosewood Restaurant’s cookbooks. So I jumped into Moosewood cookbooks with both feet, just trying out one recipe after another when I got home. Because those cookbooks were almost exclusively vegetarian, I’m pretty sure we ate vegetarian for a solid month, though not with any serious intent to be vegetarian, but because we thought the food was pretty good.
 I continued cooking, mostly during the summers, but also sometimes for friends in college, and then I went to
graduate school and lived in an apartment by myself, so I just continued
cooking, because it made sense to do so: cheaper and more satisfying. And the more I did it, the better I
got at it; and the better I got at it, the more I enjoyed it. At first, of course, I was basically just following recipes. But the funny thing is, the more time you spend following recipes, the more you tend to get a feel for what works together, and the more you become willing to improvise and take risks. Since I was just cooking for myself, I didn't have to worry about pleasing anyone but myself, which is a liberating way to do things.
For five years after graduate school, I worked and lived at a boarding school, where I basically didn't have to cook (in fact, the fact that I was required to eat most of my meals with students actively discouraged me from cooking most days). But there, too, I was basically free to cook what and when I wanted to, no pressure.
 By the time I started living with Lauren, I was pretty thoroughly competent at cooking, and I've been doing it ever since, experimenting with lots of cuisines and dietary plans in the intervening years. I have quite a few cookbooks--some of them are go-to cookbooks and some of them, I go through phases where I'm always cooking from them and other periods where they sit collecting dust. I pull things from the internet and either follow them or modify them as the spirit moves me.

However, other than cookies, I was an incredibly picky eater (the only pickiness I showed with cookies was a distaste for raisin). I drove my mother and my grandmother crazy with my unwillingness to eat a whole lot of things. However, when I went to college, I went ahead and tried a bunch of things because a lot of things were new and I wanted to see what I would like, and also I recognized that being a picky eater made me look kind of weird to other people (the positive power of peer pressure!), so I started eating more things.
Later that summer, I went to a writing workshop, and fired up about my new interest, I talked about it with anyone who would listen. One of the friends I made over kitchen talk was an adult male with an interest in cooking, who recommended the Moosewood Restaurant’s cookbooks. So I jumped into Moosewood cookbooks with both feet, just trying out one recipe after another when I got home. Because those cookbooks were almost exclusively vegetarian, I’m pretty sure we ate vegetarian for a solid month, though not with any serious intent to be vegetarian, but because we thought the food was pretty good.

For five years after graduate school, I worked and lived at a boarding school, where I basically didn't have to cook (in fact, the fact that I was required to eat most of my meals with students actively discouraged me from cooking most days). But there, too, I was basically free to cook what and when I wanted to, no pressure.

Wednesday, December 11, 2013
Peanut Butter Bears... er, BARS
At the risk of becoming a one-trick pony, I'm returning to the world of homemade chocolates, which I wrote about way back in October (which is to say, the post before last). As noted there, I was looking forward to experimenting with different fats and sugars to create the optimum dark chocolate experience (for the record, I've gravitated toward coconut oil and maple syrup).
My experiments, however, have moved in a different direction. A delicious, delicious direction that might help, in some small way, to bring peanut butter more firmly into the world of low-carb deliciousness.
There's a product, which is actually meant more for the low-fat crowd than the low-carbers of the world: it's called PB2, and the basic idea is that they take peanuts and squeeze out all the fat. Fat which, on a low-carb diet, isn't really a big deal (we're more concerned with added sugar). And there is some of that--the ingredient list for PB2 is roasted peanuts, sugar, and salt. The reason I went in this direction was because 1) my wife had already bought this product and 2) since it's powdered, I suspected that I could use it in a way similar to cocoa powder in my chocolate recipe.
And it turns out that, yes, I could. While it does seem counter-intuitive to take a product that had the fat removed and add fat back in, besides the convenience of using a tried and true recipe with little adjustment, there's the further advantage of getting a really healthy fat in there. The result looked something like this:

1/4 c. coconut oil (or other fat source), melted
1 T. or less raw honey or pure maple syrup
1/2 tsp vanilla
a pinch of salt
1 T. or less raw honey or pure maple syrup
1/2 tsp vanilla
a pinch of salt
1/2 c. PB2
Melt your fat in the microwave, mix in your sweetener, vanilla, and salt. Mix in the PB2 and pour into cute little silicone bear molds or other vessel for forming bars. A food scale can help to get bars to be a consistent size. Place in a freezer to harden them. Leave in freezer or move to fridge.
__________________________________________________
After making these bears--which tasted rather like peanut butter fudge--I took my candy-making a step further, seeking a peanut butter cup for the low-carber. My wife wasn't a big fan--too little sugar overall--but I quite liked my dark chocolate peanut butter cup bears.
My method was simply to make a batch of the dark chocolate and of the peanut butter treats above, then I put a silicone mold onto a food scale. I put around 7g of the chocolate on the bottom, then 15g of peanut butter, and then 7g more on top--that last chocolate, as it happened, didn't really form a distinct layer: it blended into a sort of swirl, but I was pretty happy with the result.
So happy, in fact, that I probably won't make this again.
You see, treats like this are just a bit too appealing. Eating 25g--or even 50g--of dark chocolate peanut butter bears fits fine into a low-carb diet. Eating the 200g or so that the recipe makes, all in one sitting? Not so much.
It's worth noting that, unless you're deep into a low-carb diet, this probably won't taste "sweet" with the amount of maple syrup that I used--you could, of course, use more, if carbs aren't really your concern. You could also put down the first chocolate layer and the peanut butter, freeze that for a while, and then finish each with a final layer, which would make it just that much more like a peanut butter cup.
But my sense is that there ain't nobody got time for that.
Monday, June 10, 2013
Recipe: Paleo Avocado Tomato "Pasta" Salad with Cilantro Lime Dressing
I love me some of that traditional salad of corn, black beans, tomato, avocado, and all, but on a Paleo diet, two of the main ingredients are out. What to do? Modify the heck out of it, obviously! The solution I hit on was to use spaghetti squash, which if you think about it has kind of the rich flavor of corn without, you know, being corn--or otherwise forbidden on a Paleo diet (not that we've been exactly strict about the Paleo thing lately). I thought this turned out really well, and I would definitely make it again--it has a great coolness to pair with basically any meat (for instance, something off the grill). We had steaks tonight.
Ingredients
1 small to medium spaghetti squash
1 pint grape or cherry tomatoes
2 medium avocados
1/2 med. red onion
1/2 c. olive oil
1/2 c. packed fresh cilantro
2 T. lime juice
salt and pepper to taste
Cook your spaghetti squash. My preferred method: bake whole at 400F for 45-50 minutes. You can do it faster if you slice it open, which might be a good idea here in the summer. When done, slice in half and scoop out the seeds. Scoop out the "noodles." Allow to cool before adding to the remaining ingredients (I let it cool before scooping out).
Grape tomatoes are small enough that you might forgo slicing them in half, but I would halve cherry tomatoes for sure. Dice the avocados into small (1/2" or so) cubes. Cut the red onion into small pieces. Because of the sharp flavor, I like to soak my onion in water for a while to mellow the flavor a bit. I also went ahead and added it to the food processor when I finished making my dressing, to chop the onions more finely.
Speaking of the dressing, in a small food processor, combine the oil, cilantro, lime juice, and salt and pepper. Mix everything together and give it some time for the flavors to mix. Enjoy!
Ingredients
1 small to medium spaghetti squash
1 pint grape or cherry tomatoes
2 medium avocados
1/2 med. red onion
1/2 c. olive oil
1/2 c. packed fresh cilantro
2 T. lime juice
salt and pepper to taste
Cook your spaghetti squash. My preferred method: bake whole at 400F for 45-50 minutes. You can do it faster if you slice it open, which might be a good idea here in the summer. When done, slice in half and scoop out the seeds. Scoop out the "noodles." Allow to cool before adding to the remaining ingredients (I let it cool before scooping out).
Grape tomatoes are small enough that you might forgo slicing them in half, but I would halve cherry tomatoes for sure. Dice the avocados into small (1/2" or so) cubes. Cut the red onion into small pieces. Because of the sharp flavor, I like to soak my onion in water for a while to mellow the flavor a bit. I also went ahead and added it to the food processor when I finished making my dressing, to chop the onions more finely.
Speaking of the dressing, in a small food processor, combine the oil, cilantro, lime juice, and salt and pepper. Mix everything together and give it some time for the flavors to mix. Enjoy!
Tuesday, December 18, 2012
Book Review (part 1): The 4-Hour Chef

So. If you're not familiar with Ferriss's previous work, I'll offer some background. His first book was The 4-Hour Workweek. This work had a lot of valuable parts to it, even if you don't follow the basic plan to spend way more than 4 hours per week putting together a business that can have large portions outsourced and/or automated such that you only need to put in about 4 hours per week of actual work while the business brings in big bucks. Not that there's anything wrong with that, but my point is that you could get a lot out of the book even if you don't even try to go that route (I haven't). His second book was The 4-Hour Body, which he described as the journal of a mad scientist, as he basically did his best to figure out through contact with experts on the cutting edge and through self-experimentation the most efficient ways to optimize performance in all sorts of ways. One of the central elements in the book was "losing fat," which revolved around his "Slow Carb Diet" and a handful of over-the-counter supplements, but there were also sections on building muscle, getting stronger, running faster and farther, enjoying better sex, enjoying better and/or less sleep... and hitting a baseball and swimming and... anyway, there was quite a bit to that book as well.
Which brings us to The 4-Hour Chef. There is, no doubt about it, more to this book than learning how to cook. As the subtitle puts it, this is "The simple path to cooking like a pro, learning anything, and living the good life." It's too bad Tim Ferriss never aims very high, isn't it?
Ferriss has described the book as being first and foremost about optimizing learning, with cooking just being the primary example at the heart of the book. There are five sections, plus appendices, and the first--"Meta"--is all about learning. He talks here about strength training, swimming, judo, languages, Japanese characters, shooting a basketball, making a fire, chess, tango, the World Memory Championships, and a whole bunch of other things, but always his real topic is learning, as he explains and breaks down his method--which is at once the method he used to put together this book, the method the reader can, theoretically, apply to anything, and an important part of the methodology that he will use in the book to teach the skills of a chef.
And this is an important distinction: although the book has quite a few recipes in it, it's not so much a cookbook the way that The Joy of Cooking or any of the many recipe websites on the web are cookbooks (i.e. collections of recipes). Ferriss most wants his reader to understand techniques. The techniques are taught through recipes, but each of these recipes also includes variations (to the point of being whole other recipes) and more indirect suggestions for applications of the technique, which themselves invite some experimentation ("Could I do this with X instead? Let's find out!")--of which Ferriss would certainly approve. The point isn't to learn some recipes that you'll cook over and over, though chances are you will; the point is to learn techniques that will allow you to improvise your own "recipes" as needed.
Because this is already getting rather long, I'm going to break it up over the next day or two. For now I'll just say that I'm quite enjoying this book, both for the cooking that it has me doing and for the sheer enjoyment of reading what Ferriss has to write about. There's a very real danger here that Ferriss is going in so many different directions that readers won't be able to follow him. Some people will almost certainly get frustrated and say "Can't you just tell me what I need to know about cooking??" Ferriss does speak to those people, and encourage people to skip ahead as needed. For my part, I'm fascinating by just about everything he has to say, both because he makes all the various topics interesting, and because he reveals so much of himself, and he's a pretty interesting character as well. Both his content and his tone are engaging, so that I find myself very much reading ahead of where I can possibly get in the kitchen, because I want to see what he's going to tell me next.
Saturday, December 15, 2012
You don't know beans
Henry David Thoreau, on the grounds that he didn't know beans, planted, tended, harvested, and ate a whole lot of them while he was living near Walden pond. While I may not have grown them (yet), I do feel that I've known them pretty well from the kitchen side of things.
I suspect that anyone who's been cooking for an appreciable amount of time understands that there are "Recipes As Written" and then there are "Recipes as Lived." There's what the book says and there's what we do. This is so true of the way that I cook beans that even my biggest mistakes are now basically part of the process. So I offer to you my own step-by-step directions--how I make beans. The Platonic form of this recipe comes from Nourishing Traditions.
1. Soak beans in water overnight, 12-24 hours. Usually closer to 12, or 8, because of when I remember to start soaking them. Agonize over whether to use tap water or filtered water, but always choose tap water because it's a pain in the butt to filter that much water.
2. Drain the water (see, aren't you glad you didn't filter all that water just to dump it later?). Rinse the beans several times, still with tap water, because it's still a pain to do otherwise. When the water is more or less clear, go ahead and go to the trouble of getting enough filtered water together to cover the beans. Turn the burner on to high and keep adding water as it slowly makes its way through the filter.
3. Because water takes so damned long to boil, put a lid on your pot. Because water takes so damned long to boil, wander away and do something productive with your time.
4. Forget about the beans completely until you can hear the sound of water boiling over. By the time you get to the beans, there will be nasty bean water all over your stove. Unless you want to have a disgusting mess later when it dries, you should clean up the mess now. But then, you should also be skimming off the foam, so figure out your priorities.
5. Lower the heat to as low as it will go while still simmering. Come back periodically for the next several hours to fiddle with it, as you realize that the burner is too low to keep it simmering or so high that it's basically a rapid boil.
6. While you're fiddling with the heat, you may also want to make sure that there's enough water in with the beans, unless you would prefer to have the beans turn into a scorched mess at the bottom of your pan, which is not only one of the worst things you will ever try to clean up in your kitchen, but also renders all that time you spent on steps 1-5 completely useless. But hey, if that's how you roll, go for it.
7. Beans are done when you say they're done. That might be 4 hours later, that might be 8 hours later. You're the cook here, you decide. Bean appetit!
I suspect that anyone who's been cooking for an appreciable amount of time understands that there are "Recipes As Written" and then there are "Recipes as Lived." There's what the book says and there's what we do. This is so true of the way that I cook beans that even my biggest mistakes are now basically part of the process. So I offer to you my own step-by-step directions--how I make beans. The Platonic form of this recipe comes from Nourishing Traditions.
1. Soak beans in water overnight, 12-24 hours. Usually closer to 12, or 8, because of when I remember to start soaking them. Agonize over whether to use tap water or filtered water, but always choose tap water because it's a pain in the butt to filter that much water.
2. Drain the water (see, aren't you glad you didn't filter all that water just to dump it later?). Rinse the beans several times, still with tap water, because it's still a pain to do otherwise. When the water is more or less clear, go ahead and go to the trouble of getting enough filtered water together to cover the beans. Turn the burner on to high and keep adding water as it slowly makes its way through the filter.
3. Because water takes so damned long to boil, put a lid on your pot. Because water takes so damned long to boil, wander away and do something productive with your time.
4. Forget about the beans completely until you can hear the sound of water boiling over. By the time you get to the beans, there will be nasty bean water all over your stove. Unless you want to have a disgusting mess later when it dries, you should clean up the mess now. But then, you should also be skimming off the foam, so figure out your priorities.
5. Lower the heat to as low as it will go while still simmering. Come back periodically for the next several hours to fiddle with it, as you realize that the burner is too low to keep it simmering or so high that it's basically a rapid boil.
6. While you're fiddling with the heat, you may also want to make sure that there's enough water in with the beans, unless you would prefer to have the beans turn into a scorched mess at the bottom of your pan, which is not only one of the worst things you will ever try to clean up in your kitchen, but also renders all that time you spent on steps 1-5 completely useless. But hey, if that's how you roll, go for it.
7. Beans are done when you say they're done. That might be 4 hours later, that might be 8 hours later. You're the cook here, you decide. Bean appetit!
Wednesday, December 12, 2012
Slow Carb Ethiopian food
I mentioned earlier in the month that my wife decided to
take on a new diet regimen, spitting in the face of all the temptations of the
season. She’s trying out the “Slow Carb” diet popularized by Tim Ferriss in The Four-Hour Body. I can’t exactly say
that I’ve been following that diet for the past year+, but it has informed my eating in some pretty
significant ways (I just wasn’t religious about it). She resisted it for a year
plus, because she felt like she couldn’t say no to all those other carbs. But
as she read more about the diet itself in Ferriss’s latest book, The Four-Hour Chef, she decided she
wanted to give it a try. And just as with Weight Watchers in the past, that
puts me back in the role of personal chef. This time, though, it’s a little
easier since I’m basically following the same diet (who am I kidding—I end up
following pretty much the same diet anyway).
If you’re not familiar with Slow Carb, the basic idea is
this: every meal = protein (c. 30g) + vegetable(s) + legumes (beans, lentils—these
are the slow-digesting carbs). No grains, no fruits, no dairy (except, as it
happens, cottage cheese). So actually, the dairy was always a problem for my
wife too. Oh, and the beans: not a big bean fan. So, you know, pretty much the
whole premise of the diet.
That said, it’s “so far, so good,” right now, on what might
be called a modified Slow Carb diet. At this point, it’s close, and she’s
getting results, so we won’t nitpick too much. We’ve had a couple things that
have helped her get through.
First, she’s not a big fan of beans, and she hasn’t liked
the way that I have prepared and eaten lentils for myself. This Red
Lentil Soup that a friend made was good enough to eat on its own. And then
she also remembered liking some kind of Ethiopian lentils, like we had on our
first date. Like, 7 years ago. Luckily
for me, the first recipe I tried, for Mesir
Wat, was to her liking. One nice thing about it was that it didn’t call for
any spices that I didn’t have, nor for putting together a labor-intensive blend
of spices, as some other Ethiopian recipes did. The only caveat I would add to
the recipe was that lentils do not
reach “the consistency of a thick paste” after 30-40 minutes of simmering.
However, when they get close, an immersion blender can get them right where you
want them.
What really made the dish work, though, was the Paleo
Flatbread recipe I found. It’s not exactly like a bread, but it made a nice
vessel for the Mesir Wat: the basic idea is just mixing pureed steamed
cauliflower with egg yolks and parsley, then mixing that into egg whites that have been beaten until they formed stiff
peaks. I found that a little more cauliflower than the recipe called for was no
bad thing. Also, instead of wasting a ton of coconut oil on greasing your pan
(have you checked the price of coconut oil lately??), line your pan with
parchment and either grease that or use spray oil. The flatbread came right off
with this treatment.
This flatbread includes both a protein and a vegetable,
although probably not quite enough of either one. The first night we had it, I
had the good fortune to find some reduced-price Yellowfin Tuna at the grocer,
and I seared that with some salt, pepper, and red pepper and then served it
with soy sauce as an appetizer. Yum. Making the lentils the focus of the meal, though, helps to make it a really filling meal.
Friday, March 30, 2012
Food Friday: Low-Carb Chicken Masala over faux rice
I recently found a website with some Slow-Carb (and Paleo) recipes that looked good, starting with "Thai Chicken and Slow-Carb 'Rice.'" I'm excited to try a number of Jason's recipes at Finding My Fitness, I found another I wanted to try: "Indian Butter Chicken (Minus the Butter)." The only thing I wasn't wild about was the use of a pre-made spice pack (which according to its ingredients list includes sugar), but I've made some other modifications as well, drawing from some of Jason's other ideas elsewhere on the site, as well as a Chicken Tikka Masala recipe that I really liked. A couple differences are notable: while Jason uses raw chicken, I use pre-cooked chicken, because I tend to cook up a whole chicken all at once; also, Jason's recipe appears to be targeted toward one serving, while I needed to serve two (it ended up being somewhat closer to three servings).
This was rather spicy--not over-powering, but it had some heat. I liked it very much, but my wife found it perhaps a bit too spicy and felt that it "tasted like potpourri." I think that's because of the cloves, which I will leave out next time we try it. I had wanted to include it because it was in the packaged mix Jason used and also because it was one of the spices that Penn State researchers found lower triglycerides and insulin levels (they included turmeric, cinnamon, garlic, cloves, rosemary, black pepper, oregano, and paprika). Looking back on the list, I easily could have slipped more into this dish, but maybe we'll try that next time--and really make it a potpourri! One of the other versions of this story that I read included coriander (in the Garam Masala) and ginger (also in the recipe). In the end, I don't know about piling on the spices just for possible health benefits, but if doing so can also lead to a tasty dish? Count me in!
Chicken Masala:
Ingredients
2/3 c. unsweetened coconut milk
squirt of lemon juice
1 T. Garam Masala spice mixture
½ tsp cloves (optional)
2-3 servings-worth of cooked chicken, cut into pieces
2 T. butter
1 onion, chopped
two cloves garlic
1 T. minced or crushed ginger
3 oz (half can) tomato paste
cilantro
Combine the liquid ingredients and the spices, mixing well. Add the chicken, stir to mix, and set aside.
Melt the butter in a skillet over medium heat. Saute the onion until translucent, then add garlic and ginger and cook a little longer. Add tomato paste and chicken and cook until heated through.
Faux Rice
Take 1/2 head of cauliflower and chop in a food processor to very small pieces (think grains of rice or smaller). Cook with some water in a covered pan over medium heat for 3-5 minutes, until it reaches the desired level of being cooked.
This was rather spicy--not over-powering, but it had some heat. I liked it very much, but my wife found it perhaps a bit too spicy and felt that it "tasted like potpourri." I think that's because of the cloves, which I will leave out next time we try it. I had wanted to include it because it was in the packaged mix Jason used and also because it was one of the spices that Penn State researchers found lower triglycerides and insulin levels (they included turmeric, cinnamon, garlic, cloves, rosemary, black pepper, oregano, and paprika). Looking back on the list, I easily could have slipped more into this dish, but maybe we'll try that next time--and really make it a potpourri! One of the other versions of this story that I read included coriander (in the Garam Masala) and ginger (also in the recipe). In the end, I don't know about piling on the spices just for possible health benefits, but if doing so can also lead to a tasty dish? Count me in!
Chicken Masala:
Ingredients
2/3 c. unsweetened coconut milk
squirt of lemon juice
1 T. Garam Masala spice mixture
1 1/2 tsp salt
1 tsp turmeric
1 tsp Cayenne chili powder
½ tsp cinnamon½ tsp cloves (optional)
2-3 servings-worth of cooked chicken, cut into pieces
2 T. butter
1 onion, chopped
two cloves garlic
1 T. minced or crushed ginger
3 oz (half can) tomato paste
cilantro
Combine the liquid ingredients and the spices, mixing well. Add the chicken, stir to mix, and set aside.
Melt the butter in a skillet over medium heat. Saute the onion until translucent, then add garlic and ginger and cook a little longer. Add tomato paste and chicken and cook until heated through.
Faux Rice
Take 1/2 head of cauliflower and chop in a food processor to very small pieces (think grains of rice or smaller). Cook with some water in a covered pan over medium heat for 3-5 minutes, until it reaches the desired level of being cooked.
Subscribe to:
Posts (Atom)